
Create a custom attribute directive in Angular to enforce consistency, reduce duplication and simplify your templates
In this blog, I explain the different types of directives in Angular, create a custom attribute directive and use it in a template.
As usual, you can find a fully working project on my GitHub
Angular Version: 9.1
What is a directive and what are the different types?
Directives allow us to instruct Angular how to transform the DOM when rendering a template.
There are three types of directives in Angular
Attribute Directive
- Used to alter the appearance and behavior of DOM elements.
- Examples of Angular attribute directives are
ngStyleandngClass. - You can create your own attribute directives to encapsulate common logic. Basically, anything you can do to the DOM in HTML, you can do programmatically with a custom attribute directive (i.e. add, remove, change styles, set a property like a label, add or remove a class, etc.)
Structural Directive
- Used to alter the structure of the DOM.
*indicates a structural directive. - Examples of structural directives are
*ngIfand*ngFor - You can create your own structural directives to encapsulate common logic.
Components
- Components are directives with a template!
Example use case requirements
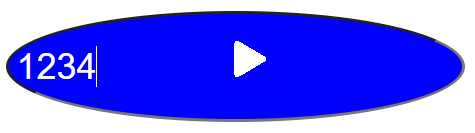
Let’s suppose a crazed visual designer has asked us to create a new look and feel for an input element in your app. I say crazed because the visual designer has provided the following requirements for our input field:
- Input should be an oval shape with no indication of focus to mess up the shape
- Limit of 10 characters
- Input should be twice the height of normal inputs
- Font size should be 24px
- When the user enters an odd number of characters, the Input background switches to green
- When the user enters an even number of characters, the Input background switches to blue
- Therefore, as user enters characters the background will switch from green to blue to green to blue to green, etc.
- When the user reaches the 10 character limit, the shape returns to normal
- Placeholder value should be, quite fittingly, ‘my funky input’
Assuming this is a one-off request, we grit our teeth and decide to implement this in the component like this:
HTML
<div>
  <input #funky
          maxlength="10"
          [ngClass]="keyCount < 10 ? 'funky-input': 'normal-input'"
          placeholder="my funky input">
</div>
CSS
.funky-input {
  line-height: 2.5;
  border-radius: 50%;
  padding: 5px;
  outline: none;
  font-size: 24px;
}

.normal-input {
  line-height: 2.5;
  border-radius: default;
  padding: 5px;
  outline: default;
  font-size: 24px;
}
Typescript
export class AppComponent implements AfterViewInit {

  constructor(private renderer: Renderer2) {}

  keyCount = 0;
  @ViewChild('funky') element: ElementRef;

  ngAfterViewInit() {
    this.renderer.listen(this.element.nativeElement, 'keydown', event => {
      if (this.keyCount % 2 == 0) {
      this.renderer.setStyle(this.element.nativeElement, 'background-color', 'green');
      this.renderer.setStyle(this.element.nativeElement, 'color', 'white');
      } else {
        this.renderer.setStyle(this.element.nativeElement, 'background-color', 'blue');
        this.renderer.setStyle(this.element.nativeElement, 'color', 'white');
      }
      this.keyCount++;
    });
  }
}
Renderer2 allows us to adjust the style of our input element from typescript and listen for the keydown event on our input element.
And it meets the requirements (click to view on YouTube)
Unfortunately, the visual designer loves it so much, he wants to implement it consistently across the entire application! Not only that, but he wants to make the colors configurable to match color schemes in various components. Ugg. Now we will have to duplicate this code in every component with an input element and maintain all that code and make sure it is consistent!
But wait, what if we create a custom attribute directive? Then all of our code would be in one place and we could easily implement it consistently across the entire application!
Create a custom attribute directive
First, we use the Angular CLI to add a directive to our app:
ng g d funky-input
And we code up our Directive like this:
import { Directive, ElementRef, Renderer2, OnInit, Input } from '@angular/core';

@Directive({
  selector: '[appFunkyInput]'
})
export class FunkyInputDirective implements OnInit {
  @Input() oddColor: string;
  @Input() evenColor: string;

  keyCount = 0;

  constructor(private element: ElementRef,
              private renderer: Renderer2) { }

  // The element that the directive is applied to is associated with our element reference
  ngOnInit() {
    this.renderer.setAttribute(this.element.nativeElement, 'maxlength', '10');
    this.renderer.setStyle(this.element.nativeElement, 'line-height', '2.5');
    this.renderer.setStyle(this.element.nativeElement, 'border-radius', '50%');
    this.renderer.setStyle(this.element.nativeElement, 'padding', '5px');
    this.renderer.setStyle(this.element.nativeElement, 'outline', 'none');
    this.renderer.setStyle(this.element.nativeElement, 'font-size', '24px');
    this.renderer.setProperty(this.element.nativeElement, 'placeholder', 'my funky input');
    this.element.nativeElement.focus();

    this.renderer.listen(this.element.nativeElement, 'keydown', event => {
      if (this.keyCount % 2 == 0) {
      this.renderer.setStyle(this.element.nativeElement, 'background-color', this.evenColor);
      this.renderer.setStyle(this.element.nativeElement, 'color', 'white');
      } else {
        this.renderer.setStyle(this.element.nativeElement, 'background-color', this.oddColor);
        this.renderer.setStyle(this.element.nativeElement, 'color', 'white');
      }
      this.keyCount++;

      if (this.keyCount > 9 ) {
        this.renderer.removeStyle(this.element.nativeElement, 'border-radius');
        this.renderer.removeStyle(this.element.nativeElement, 'red');
        this.renderer.removeStyle(this.element.nativeElement, 'outline');
      }
    });
  }
}
We’ve taken in the odd and even colors as inputs using the @Input decorator. It turns out Renderer2 is pretty powerful! We can pretty much do anything that we might normally do through our HTML and CSS. Now, we’re using Renderer2 to set styles, attributes and properties, set focus to our element and remove styles, as well as listen for the keydown event on our input field! And that’s only a small example of what Renderer2 offers. Check out Angular’s documentation on Renderer2.
And the html is very simple now. All we have to do is use our directive’s selector on an input field and use property binding to communicate our color choices. Here are two implementations with different color choices.
<div>
  <input appFunkyInput
          [oddColor]="'blue'"
          [evenColor]="'green'">
</div>

<br>

<div>
  <input appFunkyInput
          [oddColor]="'orange'"
          [evenColor]="'purple'">
</div>
It still looks awful but at least all the code is in one place when the visual designer comes to his senses and wants us to change it! (Click to view on YouTube)
Conclusion
We’ve learned how to enforce consistency by encapsulating duplicate code into a directive and simplifying our HTML.
I think custom directives are underutilized by many development teams. Perhaps this is because it is hard to imagine the use cases. This is why I laid out this blog in such a way that you may imagine the use case and see the directive’s usefulness.
Here are some real-world use cases for custom attribute directives I’ve heard of or used:
- textarea autosize (i.e. expand as user uses up the space and keeps typing)
- scroll a component vertically into view based on the current url
- make any DOM element editable by an Admin and post changes to an endpoint
- drag and drop
- ripple effects
- modify the templates of 3rd party components to add accessibility attributes
- auto-focus on input fields
- infinite scroll
- stickiness to make an element fix in a position after a certain scrolling distance
As a reminder, you can find a fully working project on my GitHub
Feel free to contact me at dave@dev-reboot.com if you have any questions or comments.
Keep on developing!